Custom block#
Here is a more detailed example on how to create a custom block by subclassing the Block class (and make it user and community-friendly). The purpose of the Block we will create is to correct for image vignetting
Dataset#
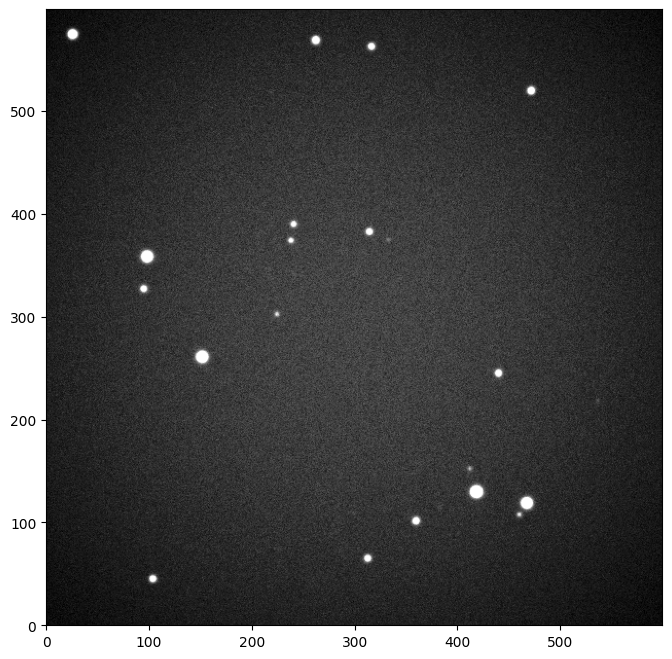
We first consider an example image
from prose import example_image

image = example_image(seed=4)
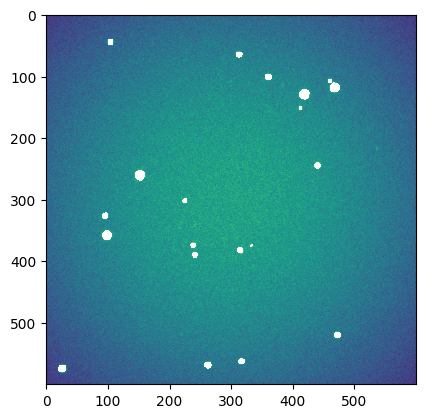
in which we include some vignetting
import numpy as np


# vignette function
def gaussian2D(XY, xy, sigma, amplitude=1):
    X, Y = XY
    x, y = xy
    return (
        amplitude
        * np.exp(-((X - x) ** 2 / sigma**2) - ((Y - y) ** 2 / sigma**2)) ** 3
    )


# vignetting the image data
XY = np.indices(image.shape)
vignette = gaussian2D(XY, (np.array(image.shape) / 2), 1000)
image.data *= vignette
image.show()
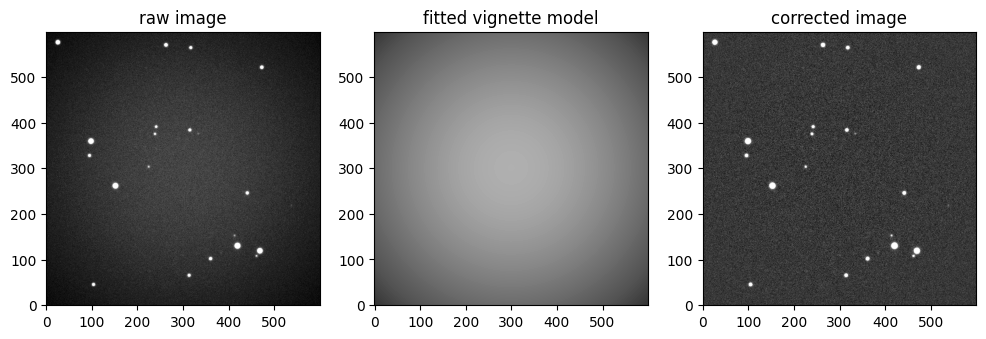
Method#
The method to correct for the vignetting is simple:
We build a sigma-clipped version of the image to exclude bright (stars) pixels (iteratively)
We fit the vignette model to the sigma clipped data
We correct the image from the fitted vignette
1. Sigma clipping#
import matplotlib.pyplot as plt

sg_image = image.data.copy()

sg_image = image.data.copy()
mask = np.ones_like(sg_image).astype(bool)
for _ in range(5):
    mask = np.abs((sg_image - np.median(sg_image[mask]))) < 5 * np.std(sg_image[mask])
sg_image[~mask] = np.nan

plt.imshow(sg_image)
<matplotlib.image.AxesImage at 0x74f9501d0110>
2. Fitting the model#
from scipy.optimize import minimize

center = np.array(image.shape) / 2


def model(p):
    a, s = p
    return a * gaussian2D(XY, center, s)


def nll(p, sg_image):
    _model = model(p)
    return np.log(np.nansum((_model - sg_image) ** 2))


x0 = [5000, image.shape[0]]
sol = minimize(nll, x0, bounds=((0, np.nanmax(sg_image)), (0, 2000)), args=(sg_image,))
3. Correction#
corrected_image = image.copy()
corrected_image.data -= model(sol.x)

# plotting
# --------
plt.figure(None, (12, 6))

ax1 = plt.subplot(131, title="raw image")
image.show(ax=ax1)

ax2 = plt.subplot(132, title="fitted vignette model")
plt.imshow(
    model(sol.x),
    origin="lower",
    cmap="Greys_r",
    vmin=np.nanmin(sg_image),
    vmax=np.nanmax(sg_image),
)

ax3 = plt.subplot(133, title="corrected image")
_ = corrected_image.show(ax=ax3)
Block creation#
We will now create a block to be able to apply this correction in a Sequence ( and easily associate it to other processing blocks)
The simple way#
The simpliest way is to subclass the Block class, and copy-paste the code above into its run(self, image) method, which will be called on each Image
from prose import Block


class SimpleVignettingCorr(Block):
    def __init__(self, **kwargs):
        super().__init__(self, **kwargs)

    def run(self, image):
        # 1. Sigma clipping
        sg_image = image.data.copy()
        mask = np.ones_like(sg_image).astype(bool)
        for _ in range(5):
            mask = np.abs((sg_image - np.median(sg_image[mask]))) < 5 * np.std(
                sg_image[mask]
            )
        sg_image[~mask] = np.nan

        XY = np.indices(image.shape)
        center = np.array(image.shape) / 2

        # 2. Fitting the model
        def model(p):
            a, s = p
            return a * gaussian2D(XY, center, s)

        def nll(p, sg_image):
            _model = model(p)
            return np.log(np.nansum((_model - sg_image) ** 2))

        x0 = [5000, image.shape[0]]
        sol = minimize(
            nll, x0, bounds=((0, np.nanmax(sg_image)), (0, 2000)), args=(sg_image,)
        )

        # correction
        image.data -= model(sol.x)
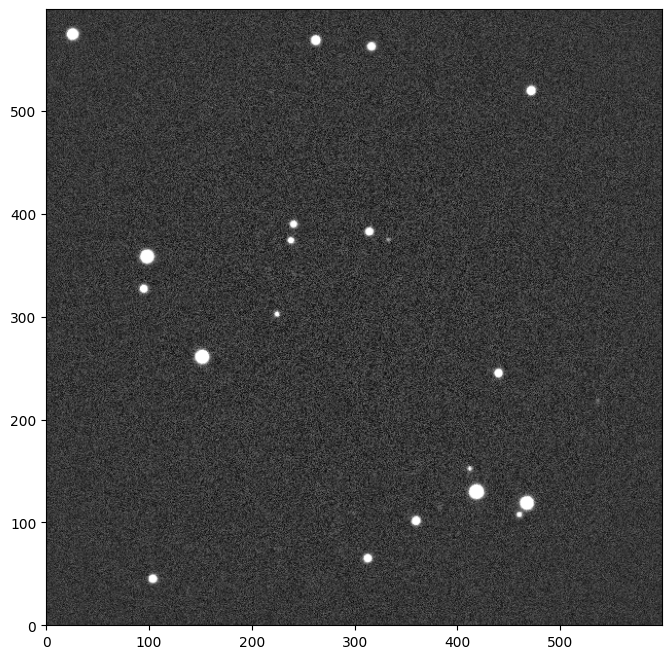
and applying it to data
corrected_image = SimpleVignettingCorr()(image)
_ = corrected_image.show()

User-friendly block#
The block SimpleVignettingCorr does the work, but is not optimized. Indeed:
XYandcenterare computed for each image, whereas images with similar characteristics (like shape and center) are more likely to be fed into a sequenceThe model parameters optimisation always start from an uninformed guess
x0, whereas the solution from a previous image is likely to be a good guessthe code within
runis lengthy and could be organized using class methods
A good way to solve 1. is to provide the block with a reference image, from which XY and center can be pre-computed. To solve 2., the last optmized parameters can be recorded and used as a first guess for the next optimization. Let’s implement these two ideas in the block together with a bit of cleaning (solving 3.)
class BetterVignettingCorr(Block):
    # allowing for a reference image to be provided
    def __init__(self, reference=None, **kwargs):
        super().__init__(self, **kwargs)

        # to avoid re-computing it for every new image
        self.XY = None
        self.center = None

        # to save last optimized parameters
        self.x0 = None

        # pre-computing parameters if reference provided
        if reference is not None:
            self.XY = np.indices(reference.shape)
            self.center = np.array(reference.shape) / 2
            self.x0 = [5000, reference.shape[0]]

    @staticmethod
    def sigma_clip(data, n=5, sigma=5):
        sg_image = data.copy()
        mask = np.ones_like(sg_image).astype(bool)
        for _ in range(5):
            mask = np.abs((sg_image - np.median(sg_image[mask]))) < 5 * np.std(
                sg_image[mask]
            )
        sg_image[~mask] = np.nan
        return sg_image

    def model(self, p):
        a, s = p
        return a * gaussian2D(self.XY, self.center, s)

    def chi(self, p, sg_image):
        model = self.model(p)
        return np.nansum((model - sg_image) ** 2)

    def run(self, image):
        # sigma clipping
        sg_image = self.sigma_clip(image.data)

        # if no reference, using first image to initialize parameters
        if self.x0 is None:
            self.x0 = [5000, image.shape[0]]
        if self.XY is None:
            self.XY = np.indices(image.shape)
            self.center = np.array(image.shape) / 2

        sol = minimize(
            self.chi,
            self.x0,
            bounds=((0, np.nanmax(sg_image)), (0, 2000)),
            args=(sg_image,),
        )
        self.x0 = sol.x  # keeping optimized parameters as first guess for next image

        # correction
        image.data -= model(sol.x)
and applying it to data
corrected_image = BetterVignettingCorr()(image)
_ = corrected_image.show()
Note
Here, the performance of BetterVignettingCorr against SimpleVignettingCorr would be very similar, but providing a reference mechanism to a block (so it can precompute some redundant parameters) often greatly improves its performances.
Documentation#
Once created, a Block needs to be properly documented in order to be shared and properly maintained.
Acknowledgment#
Using your Block in a Sequence might lead to published results. In this context, one would need to properly aknowledge the packages and methods used by your Block, including your own work. To do that, the Block class provide the citations method, that can be overwritten in the following way:
class CitableVignettingCorr(Block):
    def __init__(self, **kwargs):
        super().__init__(self, **kwargs)

    @property
    def citations(self):
        return (
            # we used scipy (known to prose)
            "scipy",
            # your custom reference
            """@misc{my-work, author = "me", title = "My work", year = "2022"}""",
        )
To use it, let’s define a sequence with your block in it
from prose import Sequence, blocks

sequence = Sequence(
    [
        CitableVignettingCorr(),
    ]
)
and extract the aknowledgment for it (TODO)
Note
For more details, see the aknowledgment reference
TODO !
Doctring#
TODO